
On Microbibliogenesis
Originally published in American Amateur Journalist Vol. 42, No. 4, for May 1978
"Prize small things--nor think it strange that men, small things, possess."
--Alexander Crawley
I first learned about the existence of miniature books in Lieberman's Printing as a Hobby about nine years ago, but his descriptions and excellent illustrations did not do justice to the actual miniatures I later found in the Special Collections of the University of Kentucky's King Library. It was a case of love at first sight, a love that has deepened through the years as I collected, produced, and traded these small treasures. Miniature book collecting is an engrossing hobby. Ruth Adomeit, of Cleveland, Ohio, is one of the leading private collectors in America. She has about 6,000 volumes in her collection. The late Stanley Marcus was a noted collector of miniatures. Most libraries include them in special collections. The Grolier Club and the Library of Congress have some of the largest collections in the world.
My researches into the history of miniature books have been frustrating because I have not been able to find any comprehensive history. Although there are goodly numbers of articles on small books, they are widely scattered in the literature, chiefly in hard-to-trace newspapers. Miniature and near-miniature size books date back to Italy in 1491-1492. The craft reached its zenith in the late 18th and 19th centuries. Many scholars believe that the invention of a much simpler art form--photography--killed the personal press movement in the middle 1880s. Punch cutting became so highly refined that a 2-point type (but on a 4-point body) was especially created for the printing of miniatures. In 1827, a 2-1/2-point type was cut on a 2-1/2-point body (Didot system)! None of these types or matrices are extant today. More miniatures are being produced today in Hungary than in all the rest of the world. Achille St. Onge is the leading printer-publisher of miniatures in the United States.
It is amazing to me that so few hobby printers are interested in printing miniatures. Even diminutive 3x5 Kelsey presses will allow hobbyists to create beautiful small books. I have printed all of mine on a Kelsey 5x8 press. Miniatures require little type and paper, and usually short manuscripts. They are unqualified joys to design, typeset, print, and bind. The more I create, the more I want to do. I would like here to share with you some of my experiences in the production of miniature books.
A miniature book is, by definition, less than three inches in the greatest dimension. Because of their size and novelty, all miniatures are potential collectors' items, but many collectors seek even smaller books, less than 2-1/2 inches. I am currently working on one measuring 1-13/16 by 2 inches (illustration 6). To librarians, miniature books are known as 64 MOs, printed on a sheet folded five times, resulting in 64 pages. (A 9x12 inch sheet folded thusly yields a book 1-1/2x2-3/4 inches.) I use readily available standard 8-1/2x11 sheets folded four times (32MO) to print books measuring 2x2-3/4 inches.
 |
| 1: Copyfitting the manuscript |
It would be presumptuous of me to try to tell printers how to print miniature books; printing is printing, whatever the size of the pages. Small typeforms are considerably easier to print than larger forms, so I feel that miniatures are easier to print than most of the journals distributed in our association. It is difficult, though, to begin to think small. As I gain experience, more and more of my time is spent in choosing subjects and designing books. Rough sketches can be of help in this process, and my growing notebook of printing data and design sketches help visualize the finished book.
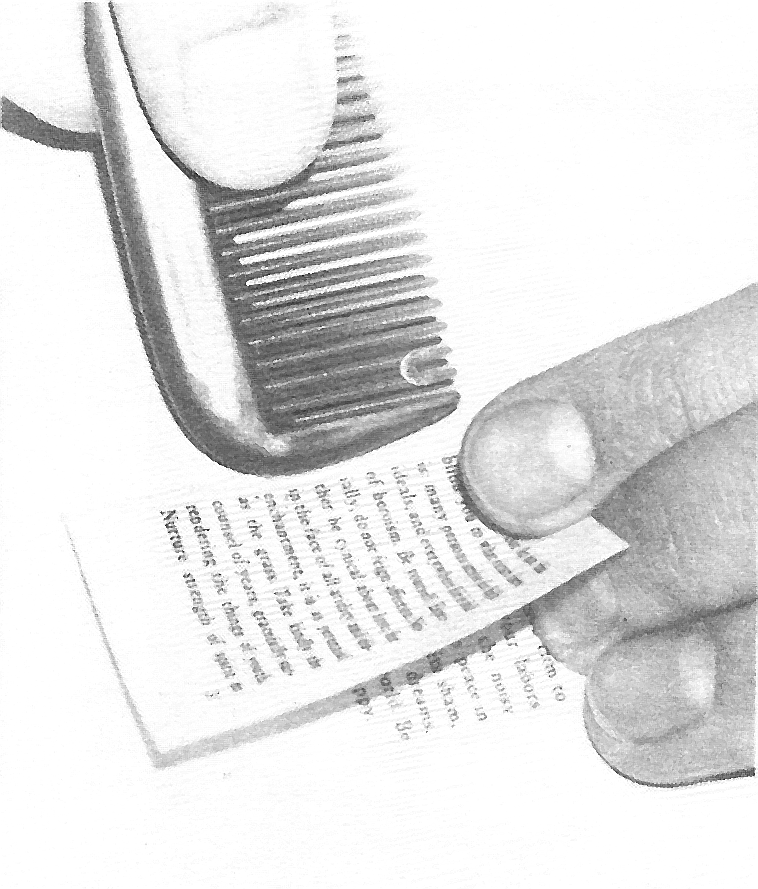
After deciding on the page size, line length, and the number of lines per page, I copyfit my manuscript. Knowing how many type characters I can set per inch, I adjust the margins of my typewriter for the average number of spaces in the short eight- or ten-pica lines (illustration 1: copyfitting the manuscript).
Double spacing this copy-fitting manuscript permits greater legibility during typesetting. After determining how many lines of type I have to set, I make up a blank, small dummy of the book. Page layout is then planned carefully. A determination of what illustrations are desired is made and where they best fit in the dummy.
To break up the general monotony of typesetting, I usually systematically cut paper for the edition and set type, alternately. Measurements of the dummy are made, and the dimensions of the cases are calculated. Personally, the construction of the cases is the least interesting labor in the entire creative sequence. For binding cloth I generally purchase finely-decorated, colorful cotton cloth from remnant houses. Boards are cut from chipboard, and the cases are patiently glued together. Each time I finish the printing on a new miniature, I wish I had completed the cases for the edition first, before setting the first lines of type, but so far I haven't been that organized.
 |
 |
|
| 2. Typesetting | 3. Typeform tied up |
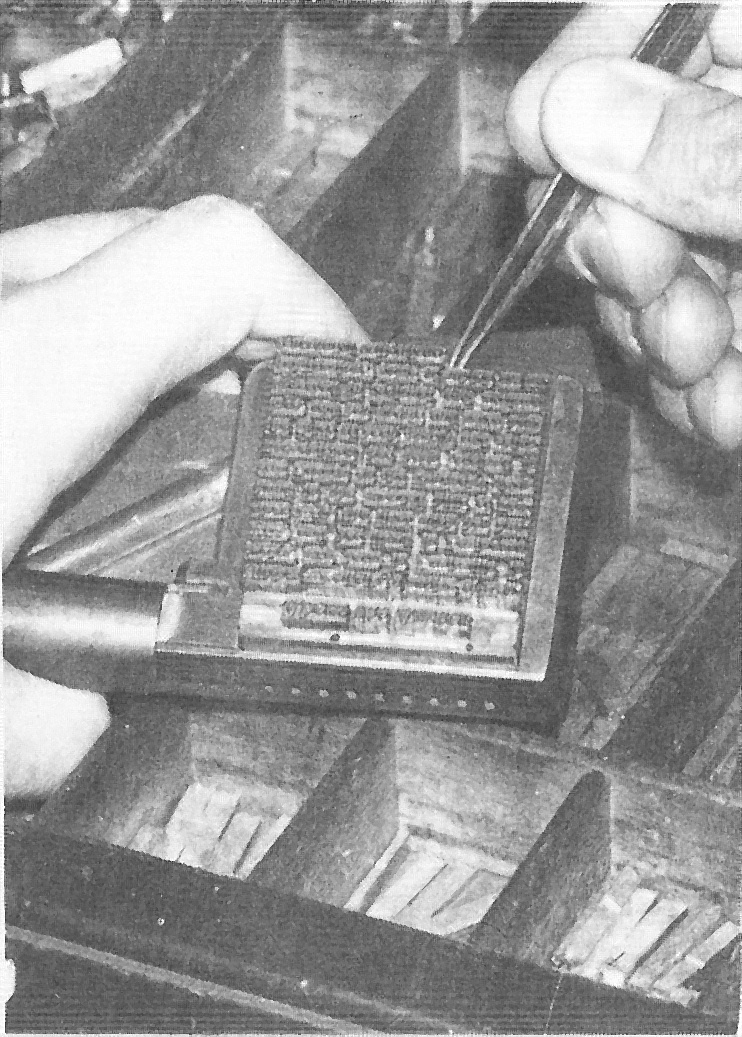
As each tiny page is set in type (illustration 2: Typesetting) it is tied up in a galley (illustration 3: Typeform tied up).
Although I generally prefer to set all the type before beginning to print, it is often more fun to set and print the wee pages one at a time. No particular schedule is ever followed, and nothing is rushed. Deadlines have a devastating way of detracting from the fun of making these books.
The choice of paper is important. In larger books, the paper is usually the most expensive part of the production. As most who do much printing have discovered in their evolution in the Black Art, paper makes the publication. I have used a wide variety of papers, from hard-to-print-on cheap, bond stock, to beautiful laid, hand-dipped sheets. In the printing of miniatures, even the most costly hand-made papers are, in use, inexpensive because of the small quantity required. One of my recent favorite papers is the readily available, inexpensive Speedball Rice Paper, an unsized paper designed primarily for use as an art paper for the printing of linecuts. Because it is so absorbent, it is especially easy to print on. But, since it is transparent, it must be printed on one side only, and French-folded, like most thin Japanese art papers. French-folding gives often needed extra bulk to small books. I would advise that you avoid bond papers, especially the more handsome, laid-pattern bonds sold as stationery. They are usually exasperatingly difficult to print on.
 |
||
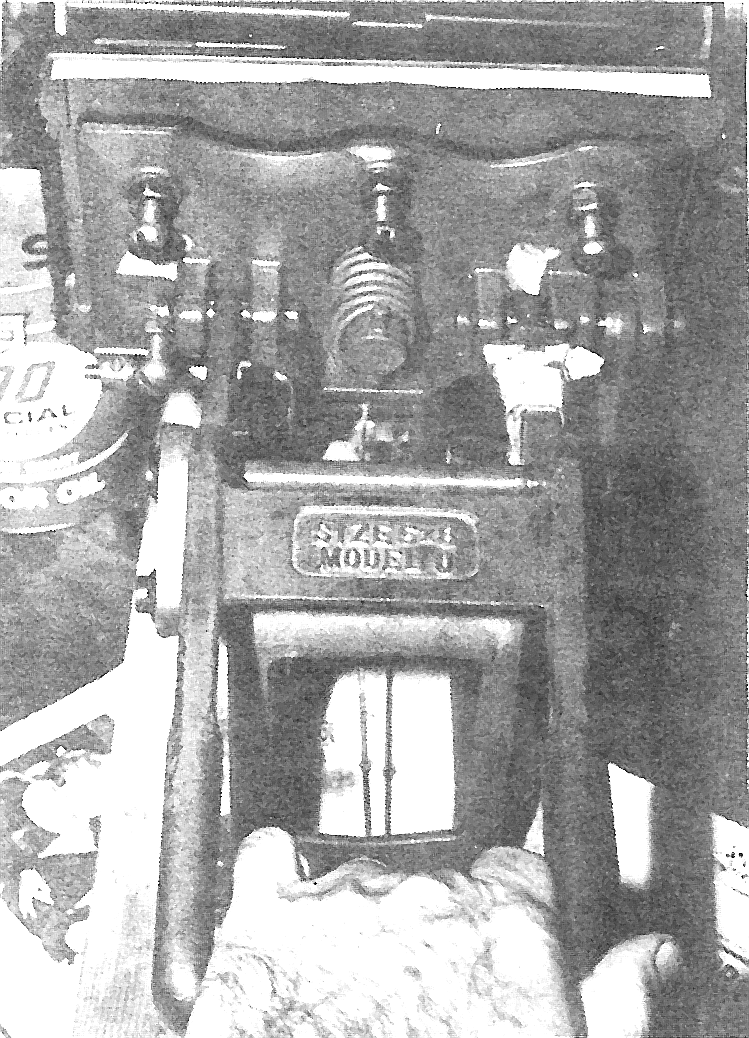
| 4. Lockup in 5x8 chase | ||
 |
 |
|
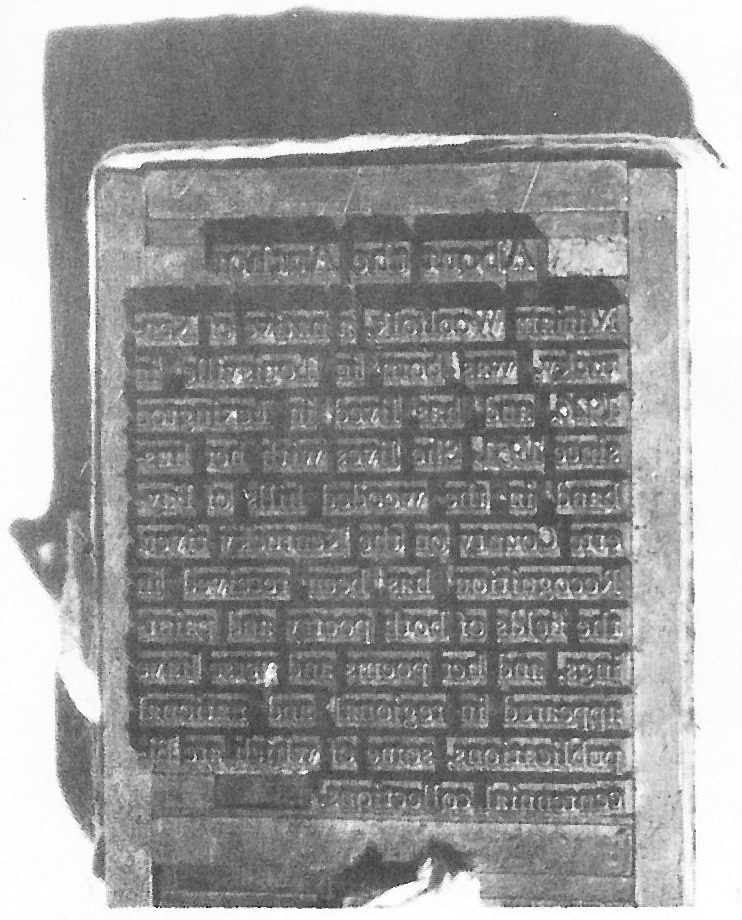
| 5. Making the impression | 6. An actual printed page | |
The only serious problem I have encountered in the printing process was cured by inserting roller bearers in the ends of my chase. Few Kelsey rollers have the same diameter as the Kelsey-supplied roller trucks, and consequently the rollers often wipe ink off of isolated types in the forms, especially the folios.
 |
 |
|
| 7: Folding | 8: Gluing |
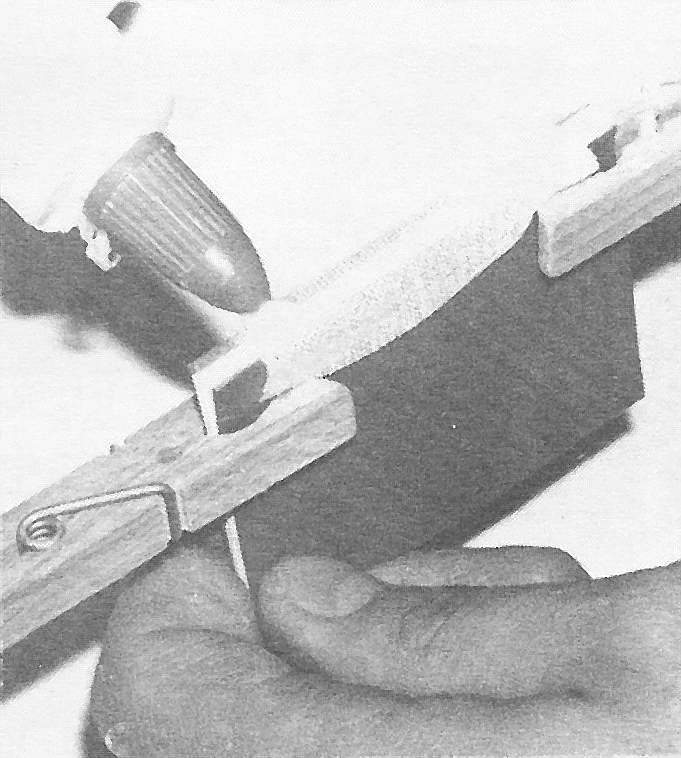
After printing, the pages are folded and collated (illustration 7: Folding). If eight- or twelve-page signatures are printed, they must be sewn together, a process you can learn about from instructional books available on bookbinding. Elaborate sewing frames are not necessary for binding small books which can be held in the hands and sewn easily. When French-fold, four-page signatures are used, no tedious sewing is necessary.
Folded signatures are collated and clamped with spring clothespins (illustration 8: Gluing). Top and back edges are taped square, and the spine roughened with a file. End papers are then glued on with Elmer's Glue, and a "super" cloth of one-inch, fine mesh gauze (available in rolls in all pharmacies) is applied over the glued spine, brushed down, and allowed to dry.
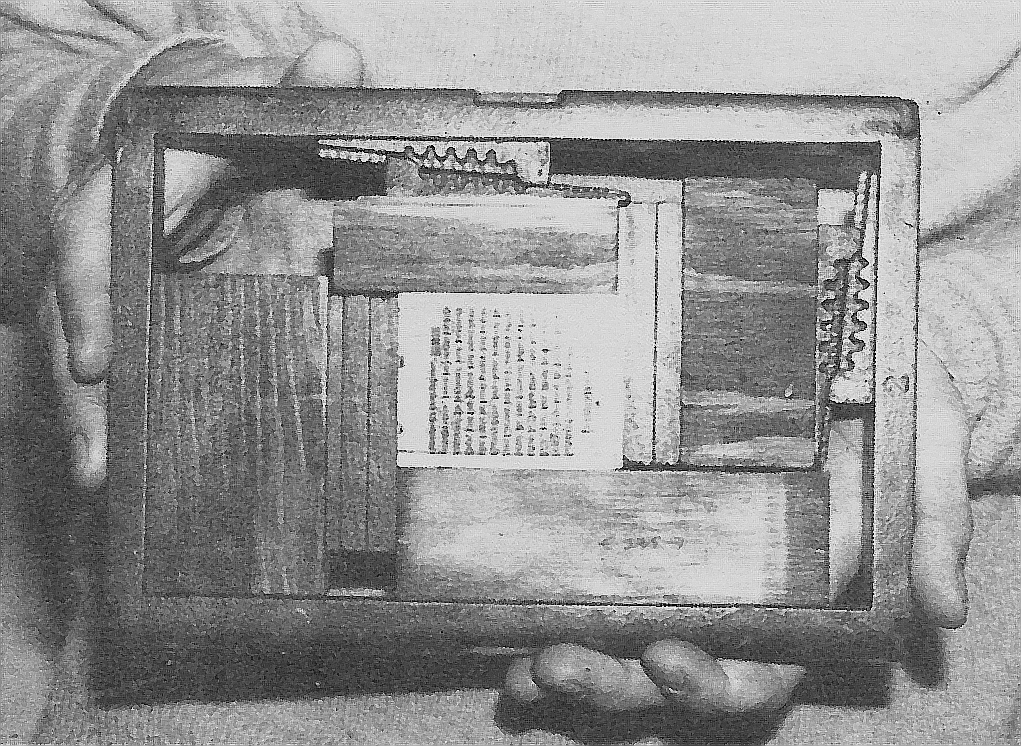
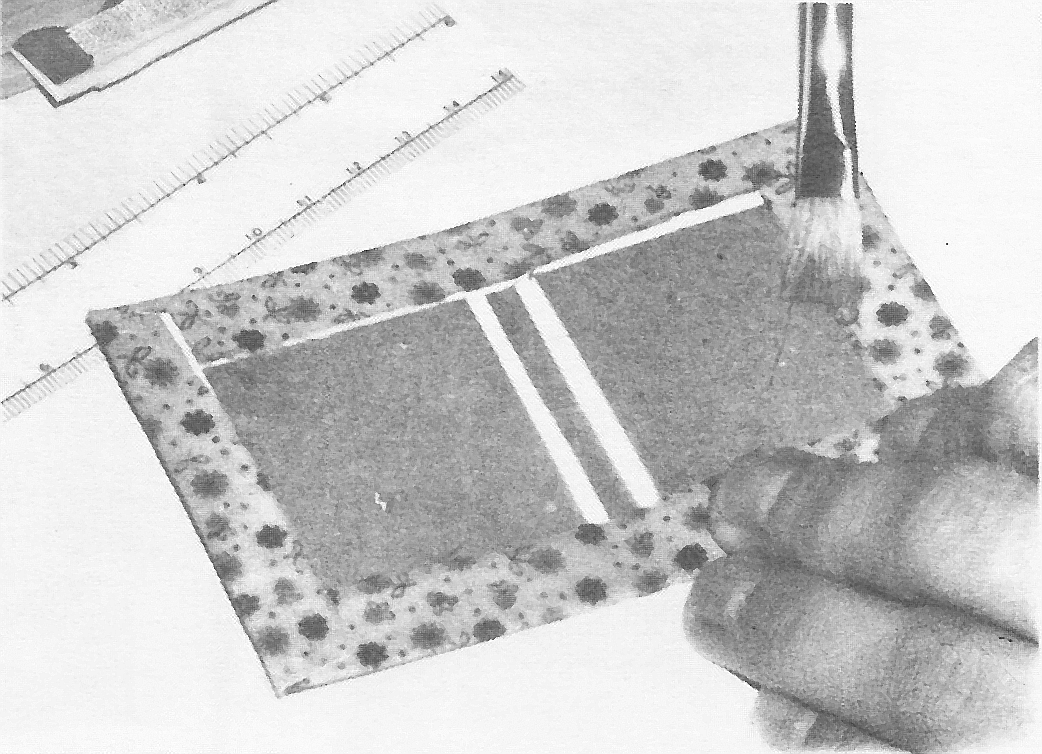
The end papers of the book and overhanging sides of the gauze are then glued into the previously prepared cases (illustration 10). No glue is placed on the spine of the book. I have learned to use Elmer's Glue undiluted, brushed thinly onto the sheets. Small pieces of waxed paper prevent moist end sheets from sticking together. I use the edge of a thin, plastic ruler to force the end papers firmly into the fold of the case.
 |
 |
|
| 9. Preparing the case | 10: Casing-in the book |
A title label is attached (illustration 11), and the finished book is placed under weights to dry for 24 hours.
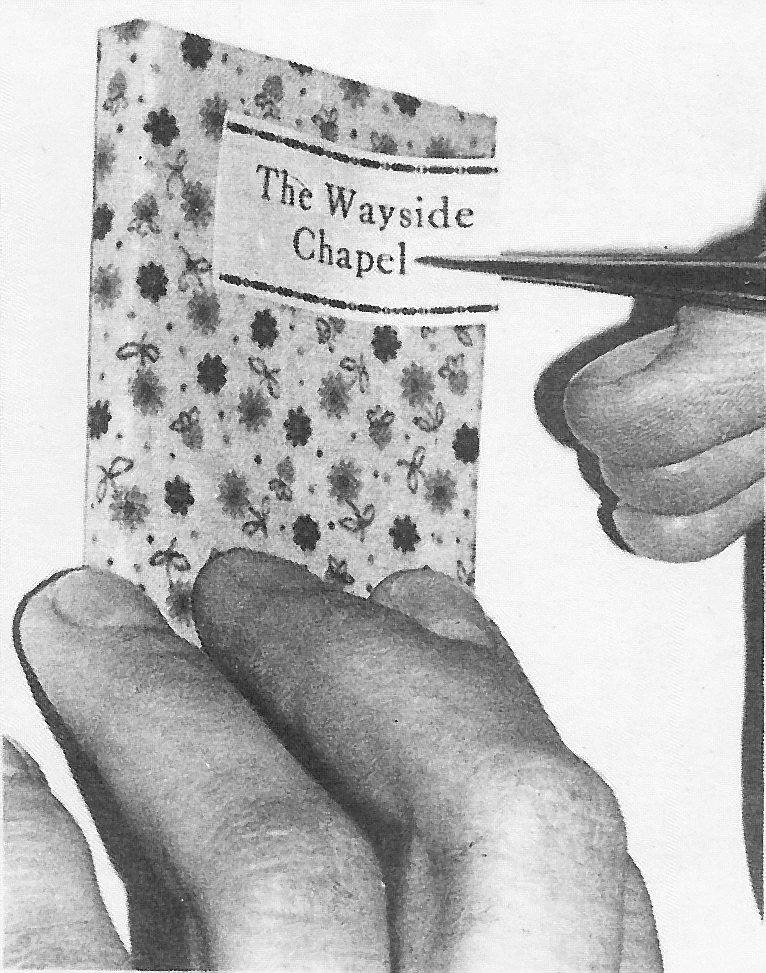 |
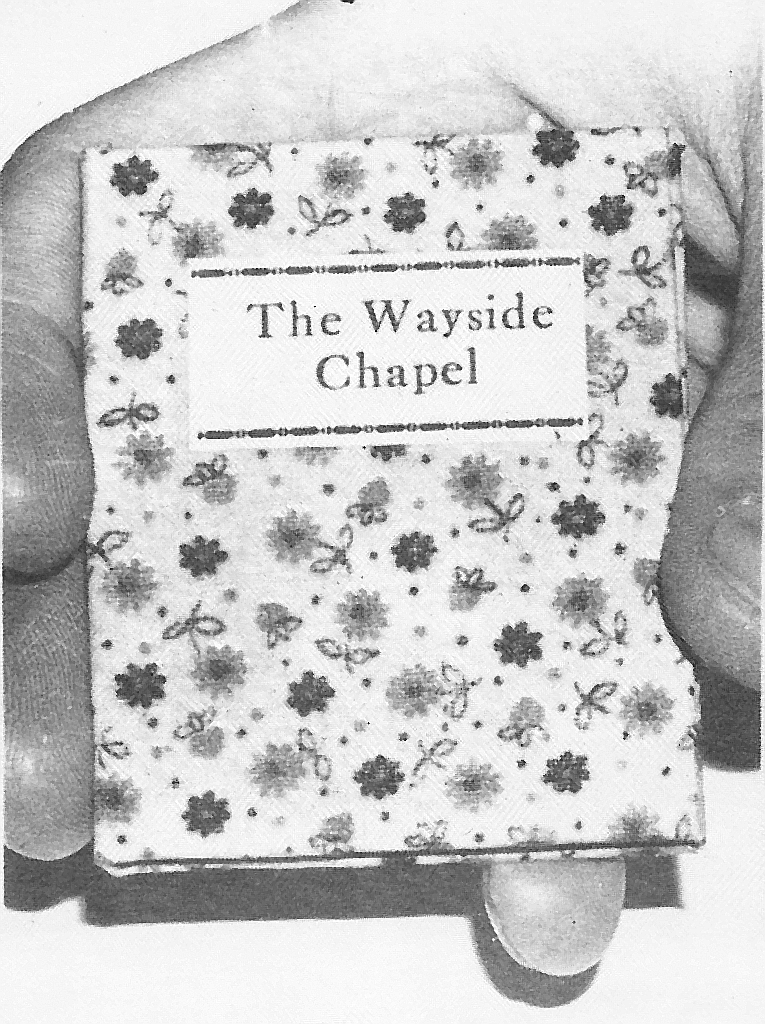 |
|
| 11. Affixing title label | 12. The finished book |
Any printer with interest and patience can create a miniature book. Six- and eight-point types are a bit more tedious to set in eight- and ten-pica lines than the larger types and longer lines most hobbyists use to print their journals. Miniatures are much more permanent than our unbound occasional, ephemeral productions. I believe it is a much greater challenge to design and print these small books than it is to create an average personal journal. Be sparing in the use of decorations. Less is more, as in most printing. Don't worry about making mistakes in your productions.
If you are a serious worker, you will learn much about the problems of such printing as soon as you get started. My first book was an esthetic disaster . . . eight-point Century Expanded type on 10 pica lines, overinked, too bold because of inadequate leading, crowded margins the use of too much color and decoration on the title page, poor sewing, and lousy binding. But, I really treasure that small first volume! My second book was an even greater collection of egregious mistakes . . . 10-point type--too large for the page, worse margins, too many unrelated type decorations, but the sewing was slightly better, and I learned much more from its production.
I now spend most of my miniature book time designing each new wee book, and, so far, each successive Lilliputian volume has been improved over its predecessor. So, print a miniature. I predict that after your first, you will do many.
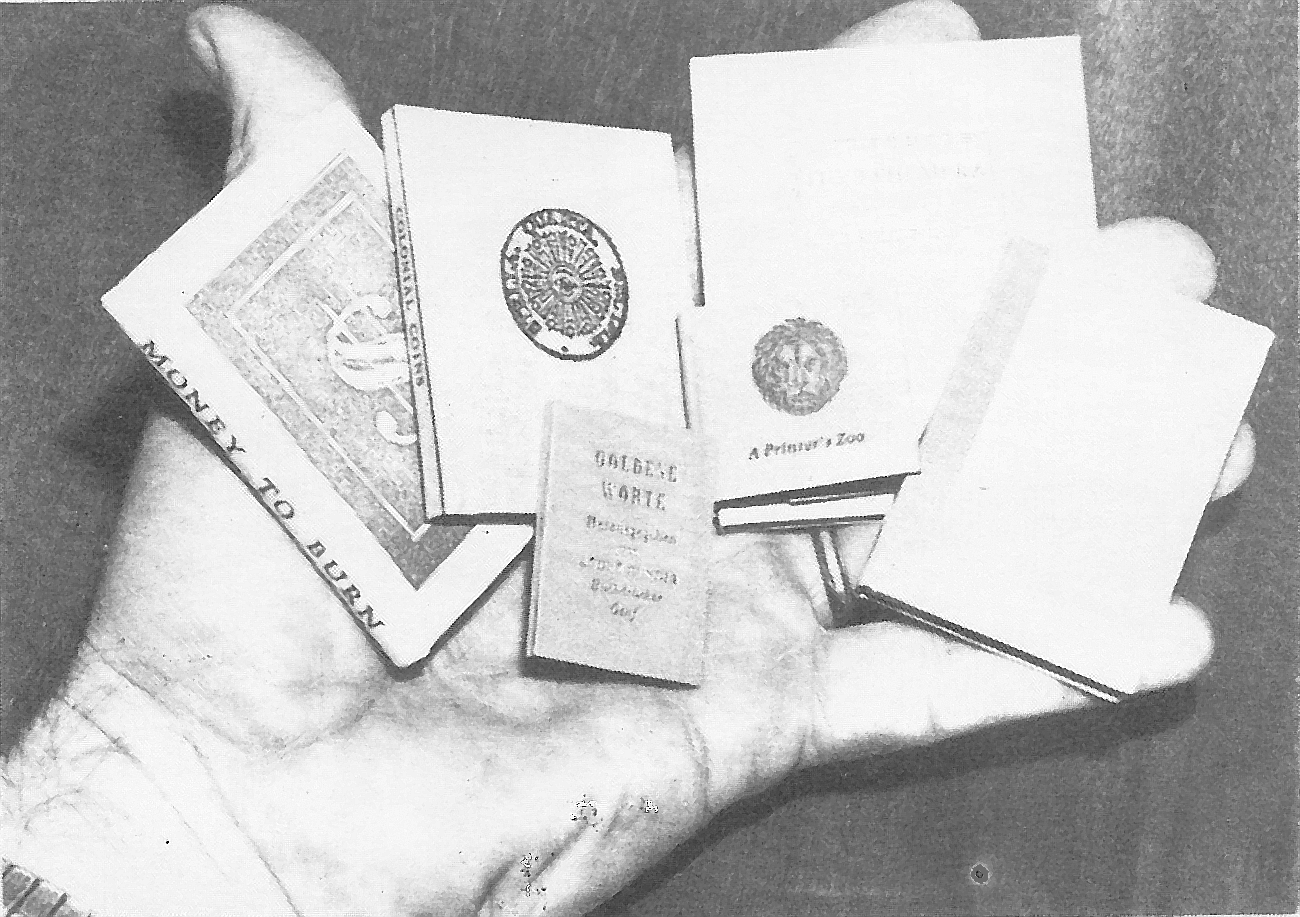 |
| 13: Other miniatures |
You can view a video of a visit to J. Hill Hamon's print shop recorded by WKTY TV in the 1980s.
JOIN AAPA!
Become A Member!
 Amateur journalism is a unique activity. Amateur journalists publish journals on paper & online & come from many perspectives: from deluxe letterpress printed journals, to Xeroxed newsletters, to artistically designed cards and ephemera. We embrace the spirit of being amateurs – loving what we do for pure joy and not financial gain – while creating top quality journals, zines, and homemade publications.
Members receive ...
- The monthly bundle mailed via the postal service
- Access to the website and e-journals
- e-mailed updates
- Ability to publish your stories on AAPA

 |
|